Snowflake & DBT
Launching DBT from within Snowflake — Partner Connect:

Launching DBT from within Snowflake — Partner Connect:
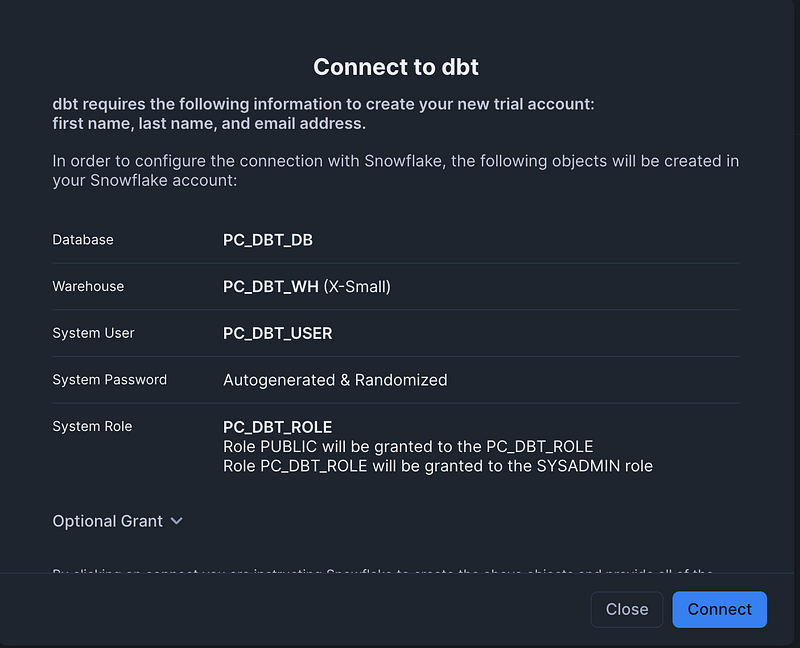
The necessary objects will be created:
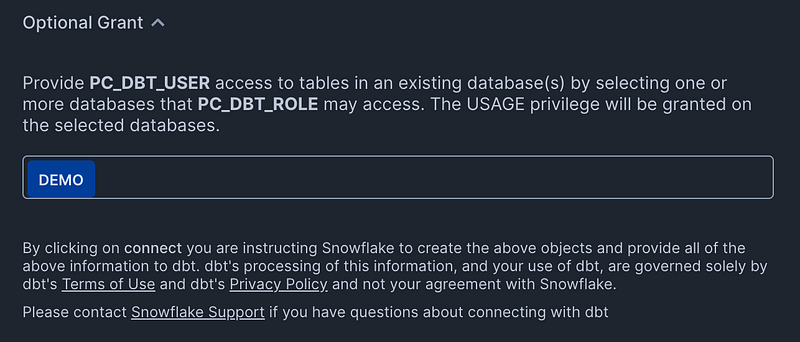
One interesting thing you will see by clicking the Optional Grant at the bottom: “Provide PC_DBT_USER access to tables in an existing database(s) by selecting one or more databases that PC_DBT_ROLE may access. The USAGE privilege will be granted on the selected databases.”. We will do this for on of the databases we have already created:
After creating the objects you will get a pop-up:

Click activate and you will be lead to the DBT registration:

You are provisioned automatically with a 13 day trial hosted on us1.dbt.com:

This onboarding procedure from within the Snowflake Data Products/Partner Connect facility is pretty smooth. The only thing missing seems a ‘uninstall’ option. Need to figure this out.
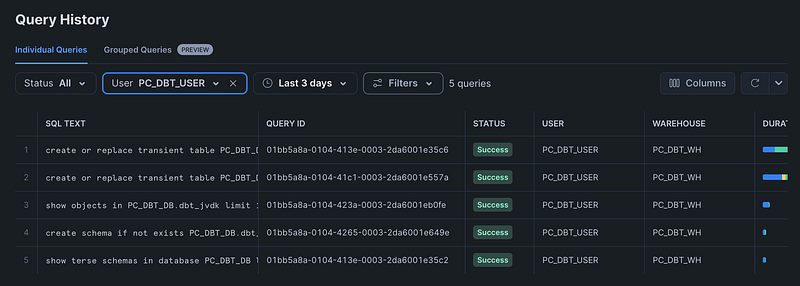
The queries that are executed upon installation are visible in the Snowflake query history, so pretty transparent:

If you want to add a database later, you could run queries 4,3,2 in this order:
GRANT USAGE ON DATABASE IDENTIFIER('"DEMO"') TO ROLE IDENTIFIER('"PC_DBT_DB_PICKER_ROLE"');
GRANT USAGE ON ALL SCHEMAS IN DATABASE IDENTIFIER('"DEMO"') TO ROLE IDENTIFIER('"PC_DBT_DB_PICKER_ROLE"');
GRANT SELECT ON ALL TABLES IN DATABASE IDENTIFIER('"DEMO"') TO ROLE IDENTIFIER('"PC_DBT_DB_PICKER_ROLE"');
Executing these 3 lines essentialy is the same as executing the ‘optional grant’ from above. One thing to keep on mind: if you want to do this for one of the Snowflake provided databases, you will get this error:
Granting individual privileges on imported database is not allowed. Use ‘GRANT IMPORTED PRIVILEGES’ instead:
USE ROLE ACCOUNTADMIN;
GRANT IMPORTED PRIVILEGES ON DATABASE IDENTIFIER('"SNOWFLAKE_SAMPLE_DATA"') TO ROLE IDENTIFIER('"PC_DBT_DB_PICKER_ROLE"');
From within DBT, we will now initialize a new project:

When you launch DBT like above, you are provided with a managed GIT repository so that you don’t need to do additional setup. We’ll figure out later how to move to our own repo.
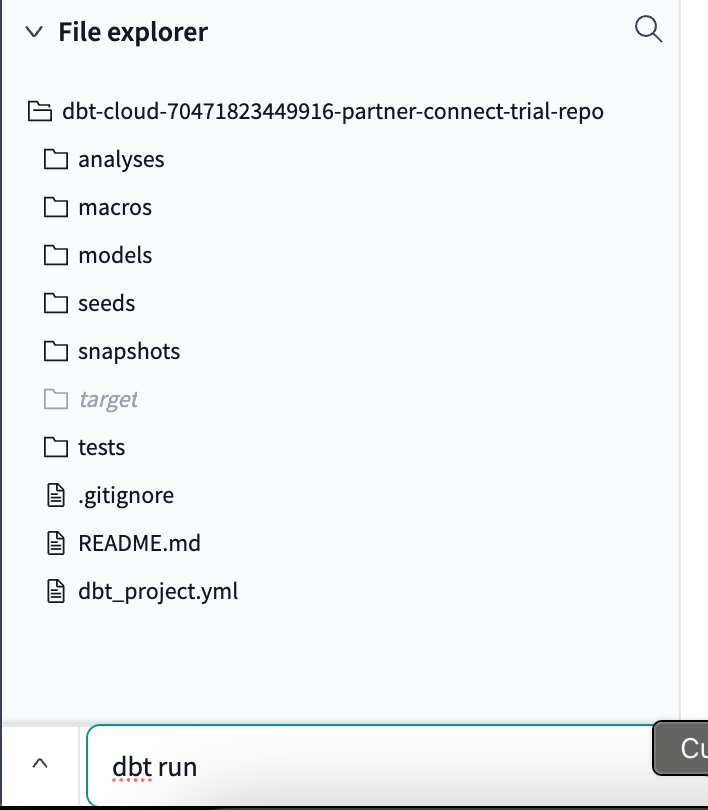
Your basic DBT structure is created:

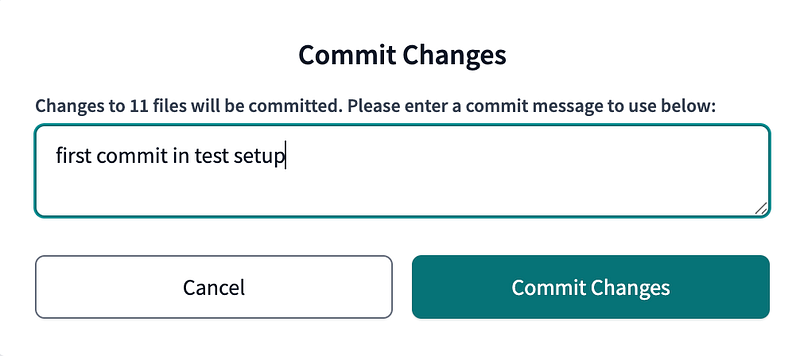
We will first commit:

Although I am not a big fan of managed GIT structures (prefer to see clean error messages in the GIT command line), this works pretty easy so far:
The ‘orange’ colors from the file structure are now black as a sign that we have no uncommitted changes.
We have this small command line box in the bottom where we can type our commands:
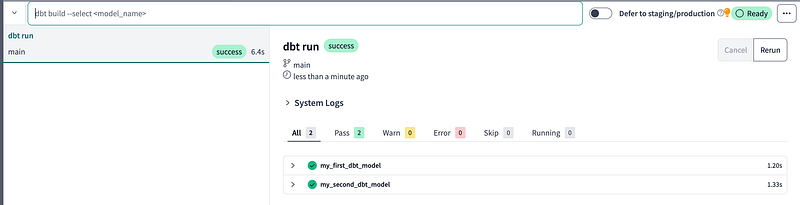
Our first dbt run is succesfull:
Where did this lead to ? In Snowflake, 2 tables are now created:
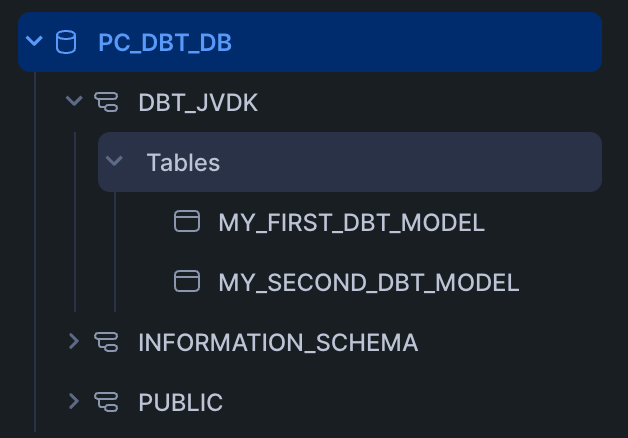
Both tables contain data, this is the script from DBT that provided the table:
/*
Welcome to your first dbt model!
Did you know that you can also configure models directly within SQL files?
This will override configurations stated in dbt_project.yml
Try changing "table" to "view" below
*/
{{ config(materialized='table') }}
with source_data as (
select 1 as id
union all
select null as id
)
select *
from source_data
/*
Uncomment the line below to remove records with null `id` values
*/
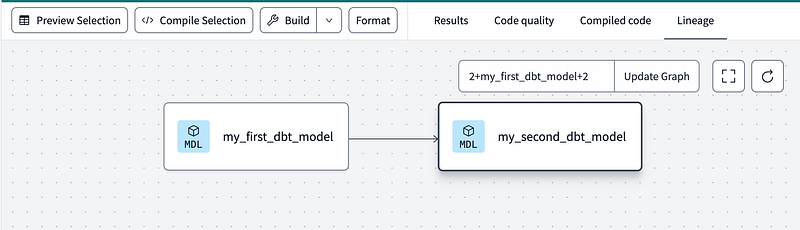
-- where id is not nullWe also get some out-of-the box lineage:
The queries in Snowflake are executed by the provided PC_DBT_USER:
For the rest of this initial DBT exploration, please follow the Quickstart:

A lot of stuff to explore:
- dbt docs generate -> see what documentation we get
- the lineage part, will it show lineage for Snowflake objects or just DBT models ?
- moving code throught DTAP
Will be working on this as well.